Rendering convincing environments in realtime has always been difficult, especially for games which take place at a “human” scale. Games consist of a series of layered illusions and approximations, all working (hopefully) together to achieve a unified goal; to represent the world in which the game takes place. In the context of a simplified or fantastical world, this isn’t too bad. It’s a matter of creating a unified style and theme that feels grounded in the reality of the particular game. The fantastic narrative platformer “Thomas was Alone”, for example, arguably conveys a believable world using just shape and color. As soon as a game takes place in an approximation of our real world however, the cracks start to appear. There are a tremendous number of “details” in the real world. Subtle differences on seemingly identical surfaces that the eye can perceive, even if not consciously.

This CG incarnation of Dwayne Johnson as the titular “Scorpion King” is a prime example of “The Uncanny Valley”
We as humans are exceptionally good at identifying visual phenomena, and more importantly, its absence. You may have heard this referred to as “The Uncanny Valley”; when something is too realistic to be considered cute or cartoony, but too unrealistic to look… right… It’s extremely important to include some representation of those “missing” pieces, even if they’re not 100% accurate in order to preserve the illusion.
While not nearly as noticeable at first glance, missing details in an environment are equally important to preserving the illusion of a living, breathing, virtual world.
Take, for example, this furniture store from GTA IV.

A nice looking furniture store, though something’s missing…
This is a very nice piece of environment art. It’s visually interesting, it fits the theme and location, and it seems cohesive within the world… though something is amiss. The view through the windows is clearly just a picture of a store, slapped directly onto the window pane, like a sticker on the glass! There’s no perspective difference between the individual windows on different parts of the facade. The view of the interior is always head-on, even if the camera is at an angle to the interior walls. This missing effect greatly weakens the illusion.
From this, the question arises…
How do we convey volume through a window, without creating tons of work for artists, or dramatically altering the production pipeline?
Shader Tricks!
The answer (as you may have guessed from the header) lies in shader trickery! To put it simply, Shaders are tiny programs which take geometric information as input, mush it around a bunch, and output a color. Our only concern is that the final output color looks correct in the scene. What happens in the middle frankly doesn’t matter much. If we offset the output colors, we can make it look like the input geometry is offset too! If outputs are offset non-uniformly, it can be made to appear as though the rendered image is skewed, twisted, or distorted in some way.
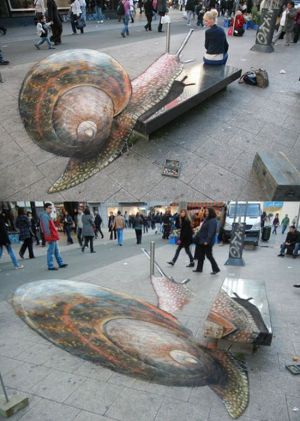
If you’ve ever seen at 3D sidewalk art, you’ve seen a real-world implementation of parallax mapping.
The school of techniques collectively known as “Parallax Mapping” do just this. Input texture coordinates are offset based on the observer angle, and a per-texel “depth” value. By determining the point where our camera ray intersects the surface height-field, we can create what amounts to a 3D projection of an otherwise 2D image. “Learn OpenGL” provides an excellent technical explanation of parallax mapping if you’re curious.
While the theory is perfect for our needs, the methodology is lacking. Parallax mapping is not without its issues! Designed to be a general-purpose solution, it suffers from a number of visible artifacts when used in our specific case. It works best on smoother height-fields, for instance. Large differences in height between texels can create weird visual distortions! There are a number of alternatives to get around this issue (such as “Steep Parallax Mapping”), but many are iterative, and result in odd “step” artifacts as the ratio of depth to iteration count increases. In order to achieve a convincing volume for our buildings using an unmodified parallax shader, we’d need to use so many iterations that it would quickly become a performance nightmare.
Interior Mapping
Parallax mapping met nearly all of our criteria, but still wasn’t suitable for our application. Whenever a general solution fails, it’s usually a good idea to sit down and consider the simplest possible specific solution that will suffice.

For each point on the true geometry (blue), select a color at the point of intersection between the camera ray, and an imaginary room volume (red).
In our case, we want rectangular rooms inset into our surface. The keyword here is “rectangular”. The generality of parallax mapping means that an iterative numeric approach must be used, since there is no analytical way to determine where our camera ray intersects a general height-field. If we limit the problem to only boxes, then an exact solution is not only possible, but trivial! Furthermore, if these boxes are guaranteed to be axis-aligned, the computation becomes extremely simple! Then, it’s just a matter of mapping the point of intersection within our room volume to a texture, and outputting the correct color!

Example of “Interior Mapping” from the original publication by Joost van Dongen.
Originally published in 2008, the now well known “Interior Mapping”, by Joost van Dongen seems like a prime candidate! In this approach, the facade of a building mesh is divided into “rooms”, and a raycast is performed for each texel. Then, the coordinate at the point of intersection between our camera ray and the room volume can be used to sample a set of “Room Textures”, and voila! This, similar to parallax mapping, offsets input texture coordinates to provide a projection of a wall, ceiling, and floor texture within each implicit “room volume”, resulting in a geometrically perfect representation of an interior without the added complexity of additional geometry and material work!
In part 2, we’ll discuss modifications to the original implementation for performance and quality-of-life improvements!

Pingback: Interior Mapping – Part 2 | Andrew Gotow